


How to Sharpen Video Quality
"How do I Sharpen video quality? How can I Sharpen a blurry video?" - Kasia Zezula
In today's digital world, video content has become an integral part of our lives. From social media to professional presentations, videos play a significant role in conveying messages and ideas. However, the quality of a video can make or break the message it conveys. One way to enhance video quality is through sharpening techniques. In this article, we'll provide you with an ultimate guide on how to sharpen video quality.
- • Part 1: Why We Need to Sharpen Video Quality
- • Part 2: How to Sharpen Video Quality on Mac/Windows PC via AVCLabs Video Enhancer AI
- • Part 3: How to Sharpen Video Quality Online for Free
- • Part 4: How to Sharpen Video Quality on Android
- • Part 5: How to Sharpen Video Quality on iPhone
- • Part 6: FAQs About Sharpening Video Quality
 Part 1: Why We Need to Sharpen Video Quality
Video quality plays a crucial role in delivering a compelling and immersive viewing experience. Sharpening video quality is essential for several reasons:
• Enhancing Detail and Clarity:
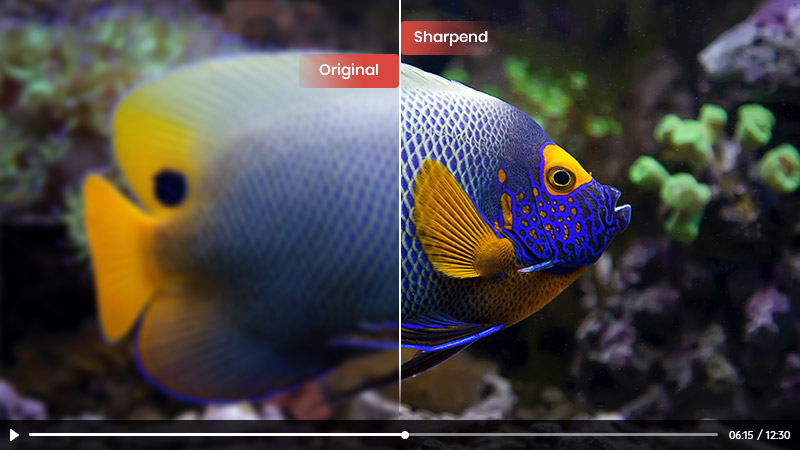
Sharpening video quality helps bring out finer details in the footage, making the image appear crisper and more defined. It improves the clarity of edges, textures, and small elements within the frame, resulting in a more visually appealing video.
• Improving Visual Engagement:
Videos with high-quality sharpness tend to grab the viewer's attention more effectively. Sharper images create a sense of realism and draw the viewer into the content, increasing their engagement and interest.
• Conveying Professionalism and Credibility:
Sharper video quality is often associated with professionalism and credibility. Whether you're producing marketing videos, educational content, or cinematic projects, maintaining high video quality helps establish trust and a positive perception of your brand or message.
• Optimizing Viewing on Different Screens:
With the rise of various devices and screen sizes, ensuring video sharpness becomes even more crucial. Sharpening videos helps compensate for the potential loss of detail when viewing on smaller screens, ensuring that your content remains visually appealing across different platforms.
• Differentiating from Competitors:
In today's saturated digital landscape, standing out from the competition is vital. By focusing on video sharpening, you can create content that looks superior to others, leaving a lasting impression on viewers and setting yourself apart from the crowd.
• Maximizing Visual Storytelling:
Visual storytelling relies on the ability to effectively communicate emotions, narratives, and messages through images. Sharpening video quality enhances the storytelling process by emphasizing key elements, expressions, and important visual cues, making the story more impactful and memorable.
• Adapting to High-Resolution Displays:
As technology advances, higher-resolution displays become increasingly common.
Sharpening video quality ensures that your content remains visually appealing and retains its intended impact when viewed on these high-resolution screens.
• Enhancing Brand Perception:
Video content reflects the quality and values of your brand. By sharpening video quality, you convey a commitment to excellence and attention to detail, which can positively influence how your brand is perceived by the audience.
Sharpening video quality is essential for capturing attention, delivering a captivating viewing experience, conveying professionalism, and optimizing content for various screens. It enhances video details, improves engagement, and helps differentiate your videos from the competition, ultimately strengthening your brand and leaving a lasting impact on viewers.
Part 2: How to Sharpen Video Quality on Mac/Windows PC via AVCLabs Video Enhancer AI
If you're looking for an easy-to-use software tool to sharpen your videos on Mac or Windows, AVCLabs Video Enhancer AI is a great option. AVCLabs Video Enhancer AI is a powerful video quality sharpening tool available for both Mac and Windows PC that can help sharpen video quality effectively.
Powered by AI technology, it enhances video quality without causing any damage to the original video. What's more, it enables users to upscale video from SD to HD (720p or 1080p), to 4K, and even up to 8K automatically and intelligently in a few clicks. Driven by powerful AI sharpening algorithms, it allows users to remove blur and noise from video. Editing expertise is unnecessary when enhancing video sharpness.
Also working with images? Try AVCLabs PhotoPro AI to sharpen, upscale, and restore old or blurry photos with ease—no editing experience needed.
Video Enhancer AI
- Enhance the video quality to make them more aesthetically pleasing.
- Deblur your footage by using machine learning.
- Upscale videos from SD to HD, HD to 4K.
- Upscale low-res videos onto a larger screen.
- Trim your footage frame by frame.

Here are simple steps to sharpen video quality on Mac and Windows PC.
Install and Run AVCLabs Video Enhancer AI
Warm tips: you can click here to check the system and hardware requirements of AVCLabs Video Enhancer AI.
Firstly download the AVCLabs Video Enhancer AI from the above button and install it on your Windows PC or Mac, then double-click on the icon to launch it.
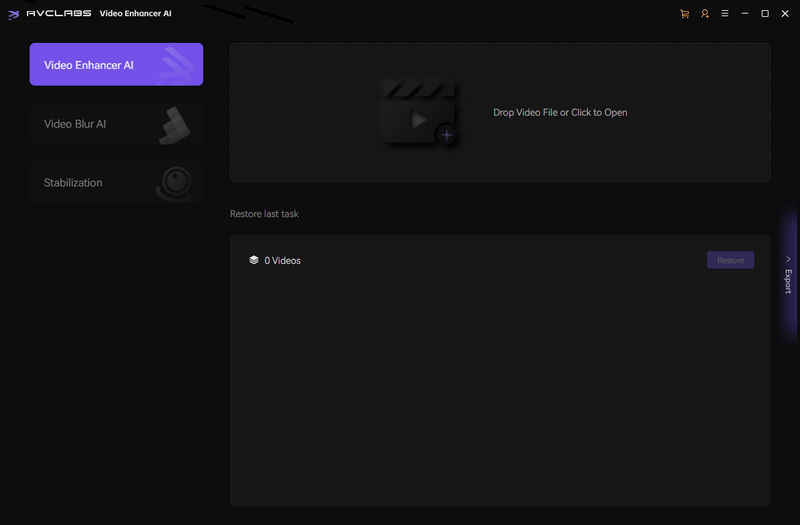
Add the Blurry Video to the Program You Need to Sharpen
You can directly drag & drop one or multiple blurry videos from your computer to the program or click on the Browse to add blurry videos to AVCLabs Video Enhancer AI.
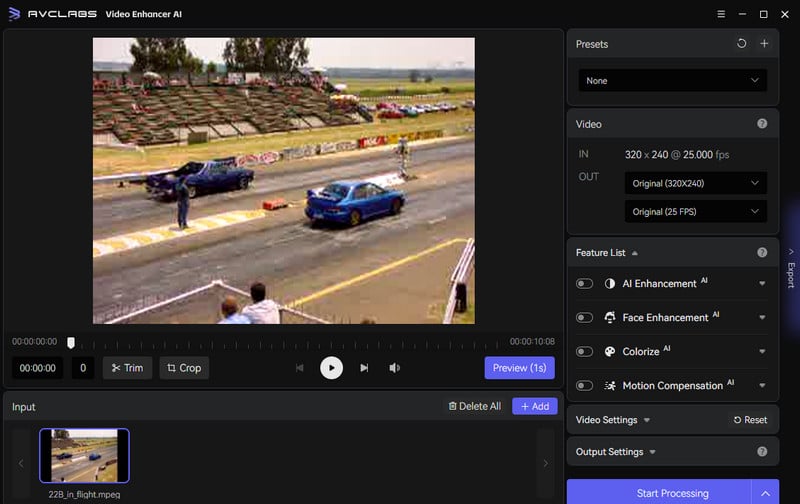
Select the Appropriate AI Model and Set the Output Parameters
Before sharpening the blurry video, you are suggested to modify some critical parameters like the processing model, output resolution, output format, and output path.
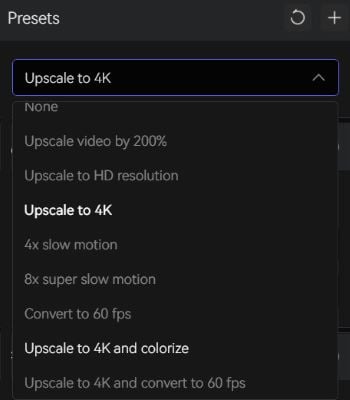
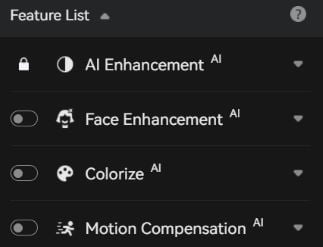
On the right panel, you are allowed to select an AI model and set output resolution like 1080p, 2k, 4k, etc. The most direct way to set 4K output resolution is to go to Presets section and select Upscale to HD resolution or Upscale to 4K. There are 8 preset pre-configured options that you can use right away.
To enhance and sharpen the face details in your video footage, you are able to turn on the Face Refinement option.
Start Sharpening Video Quality Automatically
After all the preparation work is ready, just click on the Export button to start sharpening bideo quality. The final processing time depends on your computer’s system configuration and video size.
Once the video quality sharpening process is done, simply hit on the Open Output Video button to check the output sharpened video.

Part 3: How to Sharpen Video Quality Online for Free
Sharpen the quality of your videos online for free with Clideo Video Clearer. Tired of installing software? Say no more. Clideo Video Clearer doubles as a video enhancer and allows you to sharpen and increase the quality of your videos with just a few clicks. The Adjust Video tool grants you even more control, allowing you to tweak Brightness, Contrast, Saturation, and Hue values of your video clips. Say goodbye to blurry videos and hello to impressive visuals with Clideo Video Clearer.
Follow our simple steps below to sharpen your video quality for free.
Upload Your Blurry Video
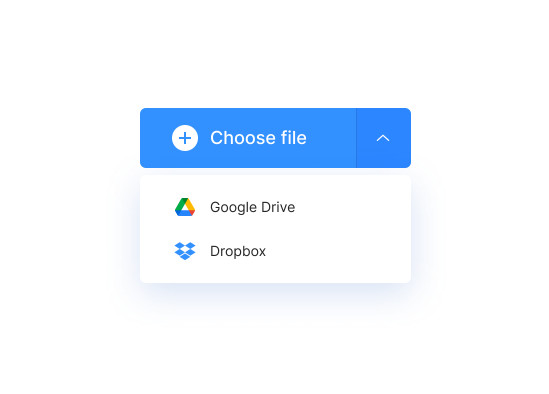
Visit the Clideo Video Clearer website and effortlessly address blurry video issues by selecting files from your computer, Google Drive, or Dropbox. Click on the Choose files button to get started.
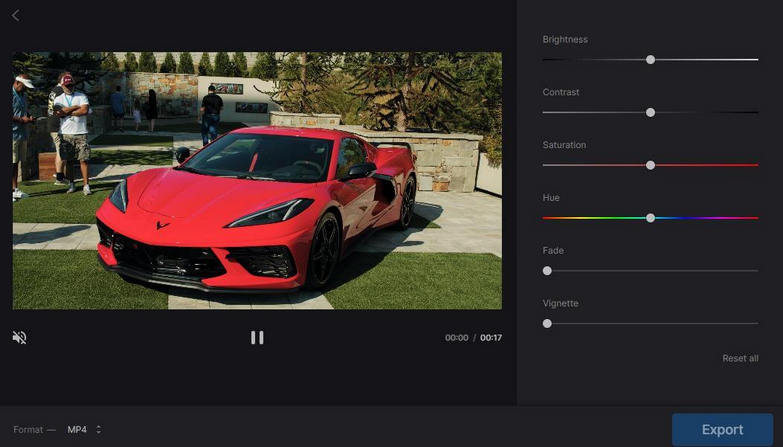
Slide to Adjust
Once your video is uploaded, you can easily access our straightforward video editor where you have the ability to adjust important settings such as brightness, saturation, and contrast. If you're looking to remove blurriness from your video, we recommend increasing the brightness and slightly lowering the contrast. While this may not fully solve issues with severely unfocused videos, it will certainly improve the overall quality.
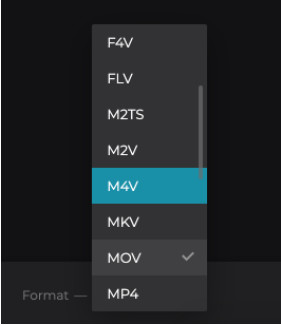
Select the Output Video Format
After making your adjustments, choose an output format from the selection including M4V, MKV, MP4, MOV, M2TS, FLV, and F4V. Opt for the MP4 format for high-quality, polished video playback on your mobile device.
Save the Clear & Sharpened Video
Preview your processed video with ease and satisfaction. Once you're happy with the outcome, simply download and save the clear and sharpened video to your Google Drive, Dropbox, or computer by clicking on the Download button.

Part 4: How to Sharpen Video Quality on Android
Want to sharpen your Android video and improve its quality? Look no further than Videoshop, the top-rated video enhancer app. With Videoshop, you can enhance video quality, eliminate blurriness, and even add slow/fast motion and voiceovers. Additionally, Videoshop offers a lip-sync tool that is perfect for social media lovers who want to add unique sound effects to their videos. From animal noises to laughter, this app has it all. Best of all, you can share your edited videos across various social media platforms, including Instagram and TikTok. Don't miss out on the opportunity to create high-quality, engaging videos with Videoshop.
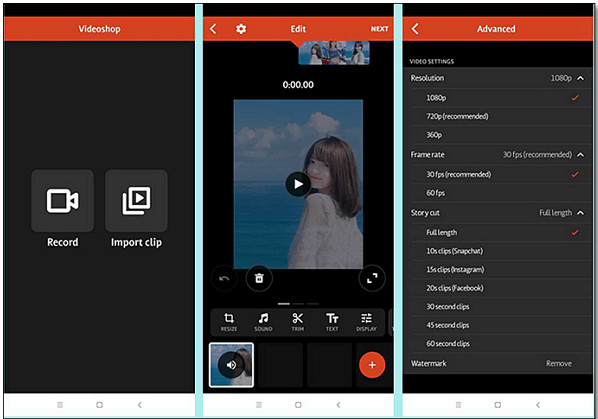
1. Open Videoshop on your Android phone and tap Import clip to upload blurry video footage.
2. Tap the Adjust Display option to change brightness, contrast, saturation, etc.
3. Tap the tick when finished.
Part 5: How to Sharpen Video Quality on iPhone
Looking to fix blurry videos on your iPhone? While iMovie doesn't have a sharpening tool for iOS, there's a great solution: Inshot. This free app is a video quality enhancer that makes it easy to edit and improve video quality on your iPhone, perfect for social media enthusiasts who want simple, flexible video editing features. Optimized for popular platforms like TikTok and Instagram, Inshot lets you resize and enhance your videos for free.
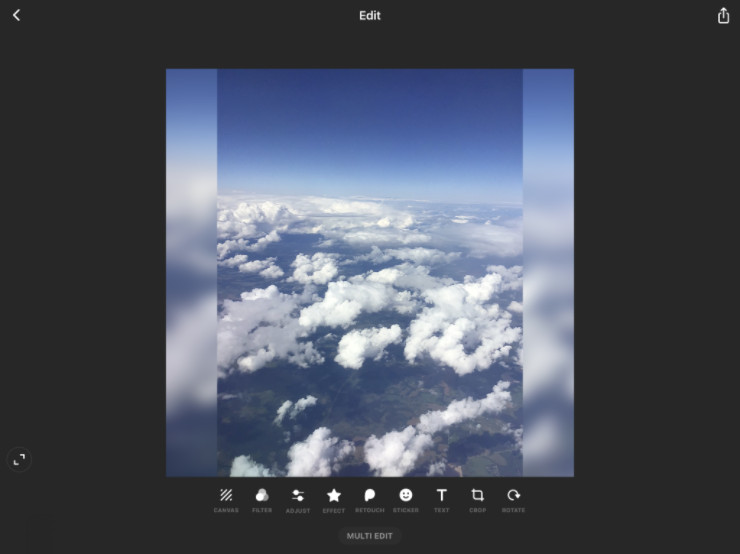
1. Open Inshot on your iPhone and then import a blurry video.
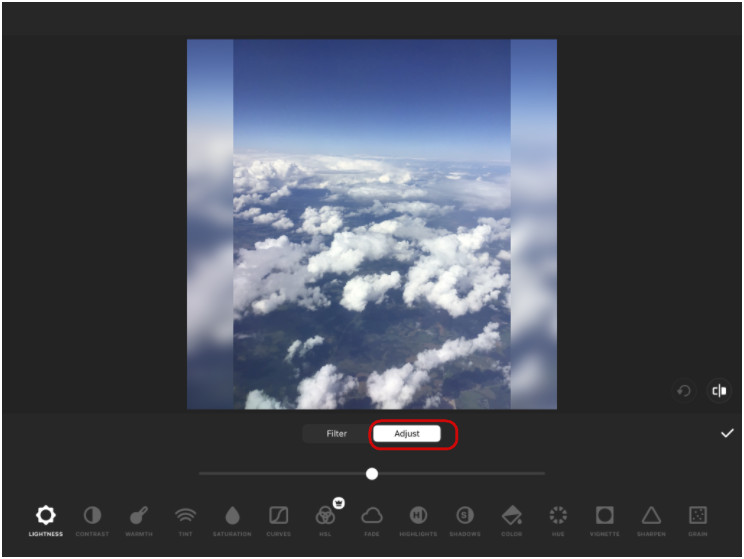
2. Hit on the Adjust option to find the full range of available effects.
3. Now simply choose the Sharpen option to move on.
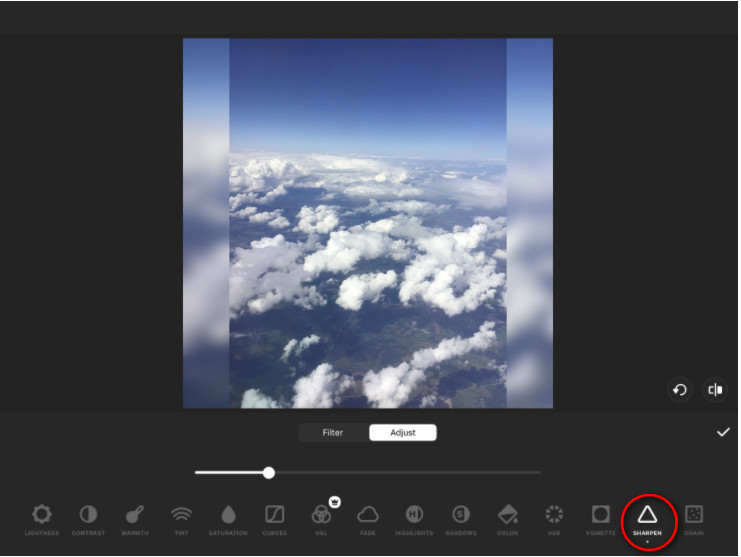
4. Regulate the intensity of the effect.
 Part 6: FAQs About Sharpening Video Quality
Here are some of the most frequently asked questions about sharpening video quality.
Q: What does sharpening video quality mean?
A: Sharpening video quality refers to the process of increasing the clarity and detail of a video by enhancing its edges and lines, resulting in a crisper and more defined image.
Q: Why is sharpening video quality important?
A: Sharpening video quality is essential as it can improve the overall visual experience of a video by making it appear more detailed and realistic. It can also help in enhancing the readability of text and making smaller details more visible, which is especially important for videos that need to convey important information.
Q: Can I sharpen video quality in post-production?
A: Yes, it is possible to sharpen video quality in post-production using software tools that provide sharpening filters and other enhancement options. This can be done using popular video editing software like Adobe Premiere Pro, Final Cut Pro X, and DaVinci Resolve, among others.
Q: Is it possible to sharpen low-quality videos?
A: While sharpening filters can improve the visual quality of a video, it may not be enough to fix a severely low-quality video. Factors like resolution, compression, and bit rate can limit the extent to which a video can be sharpened, so it's essential to start with high-quality footage to achieve the best results.
Q: Can sharpening a video degrade its quality?
A: Sharpening a video can potentially degrade its quality if the sharpening filter is overused or set too aggressively. It's essential to use a moderate approach and test the video on different displays to ensure that the sharpening does not produce unwanted artifacts or distortions.
Q: Are there any risks in sharpening video quality?
A: There are no significant risks in sharpening video quality. However, over-sharpening can lead to visual artifacts and a less natural-looking image. It's important to use moderation when applying sharpening filters and to ensure that the final result appears natural and pleasing to the eye.
Q: What are some software tools for sharpening video quality?
A: Some popular software tools for sharpening video quality include AVCLabs Video Enhancer AI, Adobe Premiere Pro, Final Cut Pro X, DaVinci Resolve, and VirtualDub, among others. These tools provide various sharpening filters and other enhancement options to help improve video quality.
Conclusion:
In conclusion, sharpening video quality is an important part of producing quality visuals to showcase your work or share with others. By utilizing AVCLabs Video Enhancer AI, you can make incredible improvements to the detailed specifics of your videos, regardless of whether you’re an experienced editor or a casual user. Additionally, for users who are looking for a more straightforward approach - both online and on mobile devices - free and accessible services are also available. We hope that this blog post has provided some insight into how one can go about sharpening video quality easily and conveniently - no matter what kind of device they might prefer! If you have any further questions regarding any aspect of sharpening video quality, please don't hesitate to refer to the FAQs section included at the end of the post or reach out to us directly so we can help answer any queries you may have!
Try AVCLabs Video Enhancer AI to breathe new life into your footage!

Related Articles & Tips
- • All You Need to Know About AVCLabs Video Enhancer AI Crack
- • AI Face Blur | How to Blur Faces in Videos Automatically And Intelligently
- • AI Video Deinterlacing Tool | How to Deinterlace Videos on Mac without Quality Loss
- • Top 3 Best AI Video Upscaling Software to Upscale Videos up to 1080p, 4K, 8K
- • How Will AI Enhance Surveillance Video Quality
- • How to Fix Instagram Story Video Blurry Problem
- • Easily AI Upscale Videos from 1080p to 4K
- • How to Restore Old Videos Automatically and Intelligently Like A Pro
- • Restore Old Home Movies to HD
- • How to Fix Bad Quality Videos
 AI Products


Hero Products


Video Converter
- MP4 Converters
- MKV to MP4 Converters
- AVI To MP4 Converters
- MOV to MP4 Converter
- Best Free AV1 Converters
- HEVC/H.265 Converter
- H.264 Video Converter
- Android Video Converter
- Samsung Video Converter
- Sony PS4 Video Converter
- Nokia Video Converter
- MPEG Video Converter
- Convert 4K to 1080P
- Convert MP4 to MP3
- Convert M2TS to MP4
- Convert MVI to MP4
- Convert WebM to MP4
- Convert Videos to MP3
- Convert MP4 to 3GP
- Convert M4V to MP4
DVD Converter
Video Editor
- Best AI Video Editors
- Free AI Video Generators
- Best AI Slideshow Makers
- Replace Face in Video
- AI Cartoon Video Generators
- Text-to-Video AI Generators
- Best Free Voice Changers
- Text-to-Video AI Generators
- Sites to Download Subtitles
- Add Subtitles to Video
- Free Online Video Compressor
- Convert Your Videos to GIFs
- Blur Video Backgrounds
- Video Editing Apps for YouTube
Video Enhancer
- Best 10 Video Enhancer
- Improve Video Quality
- Fix Blurry Videos
- Remove Noise from Footage
- Upscale Video from HD to 4K
- Upscale Video from 480P to 1080P
- Best AI Video Upscaling Tools
- Make a Blurry Video Clear
- Best Old Video Restorer
- How to Sharpen Video
- Fix Bad Quality Videos
- Increase Video Resolution
- Convert Videos to 4K
- Upscale Anime Videos to 4K
Photo Enhancer
- Fix Blurry Pictures Online
- Make Blurrys Picture Clear
- Increase Image Resolution Online
- Remove Blur from Images
- AI Image Sharpener Online
- Topaz Gigapixel AI Alternatives
- Fix Low-resolution Photos
- Colorize Historical Photos
- Remove Noise from Photos
- AI Image Sharpener
- AI Face Retoucher
- AI Image Enlargers
Mobile & PC
