
Tutorial
AVCLabs PhotoPro AI is an advanced AI-powered photo editing tool designed to streamline complex photo editing tasks with ease and precision. It automates time-consuming processes such as object removal, background replacement, photo enhancement, stylization, and colorization. With a wide range of intelligent features, users can efficiently edit images with just a few clicks, freeing up more time for creativity and visual storytelling.


Warm reminder: The free trial of AVCLabs PhotoPro AI offers all features, but output images will include a watermark. To enjoy unlimited access and remove these restrictions, we kindly recommend purchasing the full version.
How to Edit, Enhance Image with AVCLabs PhotoPro AI?
Launch AVCLabs PhotoPro AI
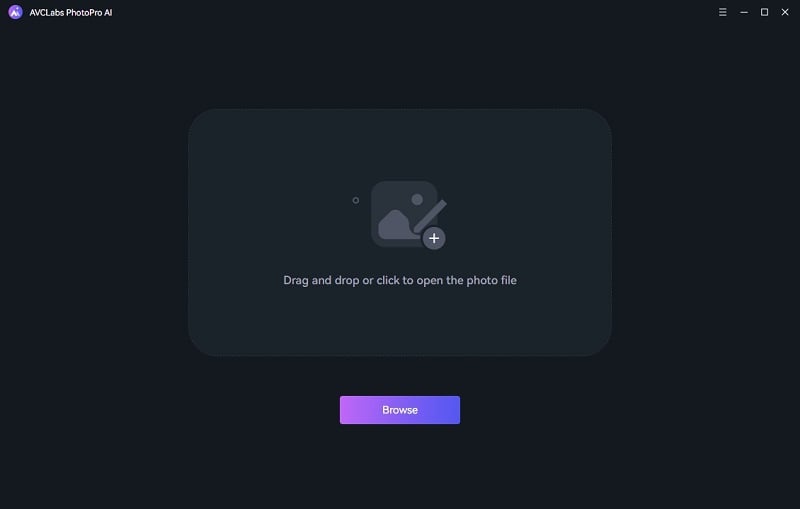
Install AVCLabs PhotoPro AI on your Windows PC or Mac. Launch the program and enter the main window shown as below.
Import Image
To import a photo, you can drag and drop it into the program or click the Browse button.
While editing, simply click the +Add button in the top-right corner to upload a new image.
The program supports various image formats, such as PNG, JPG, JPEG, BMP, RAW, and more.

Bottom Toolbar
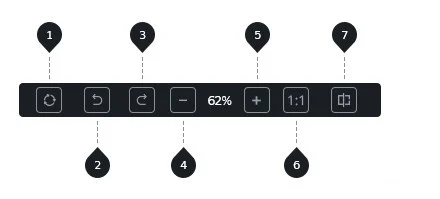
A toolbar is located at the bottom of the editing interface, designed to help you easily manipulate your images.
1. Repeat: Repeat the last action performed.
2. Previous: Undo the last operation.
3. Next: Redo the previously undone operation.
4. Zoom Out: Reduce the size of the image.
5. Zoom In: Increase the size of the image.
6. Display: View the image at 1:1 scale or full-screen resolution.
7. Contrast: Switch between the edited version and the original version of the image.
Select the Desired AI Features
After importing your image, you will find a range of available AI tools on the left panel. Select the features that best meet your requirements, whether it's for enhancement, object replacement, background isolation, or artistic styling.
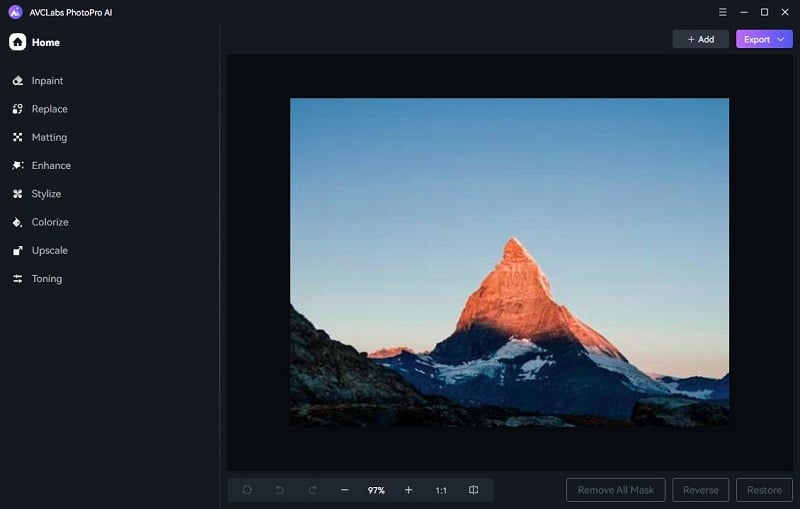
AI Inpaint: Easily remove any unwanted elements from your photo with the Inpaint tool. Powered by advanced AI algorithms, it intelligently detects and fills in the surrounding area for a natural-looking result.
AI Replace: Use the Replace tool to select any object in your image and substitute it with an AI-generated alternative. Simply enter a descriptive prompt, and the tool will create a fitting replacement.
AI Matting: Matting allows you to precisely extract subjects such as people or objects from their backgrounds. Once isolated, you can replace the background with a transparent layer or a new scene of your choice.
AI Enhance: Enhance is designed to restore and refine old or low-resolution photos. It brings out hidden details and improves overall image clarity and sharpness.
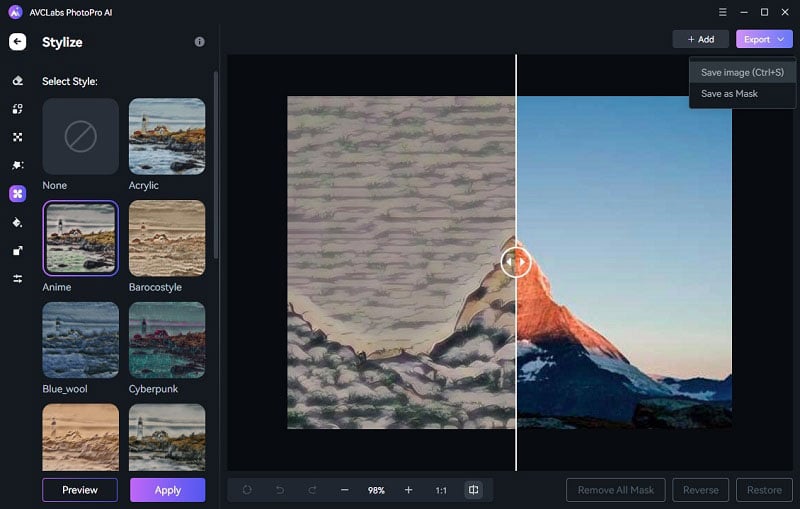
AI Stylize: Transform your photo into a piece of digital art using Stylize. Choose from a variety of creative filters that apply artistic effects, giving your image a distinct and expressive style.
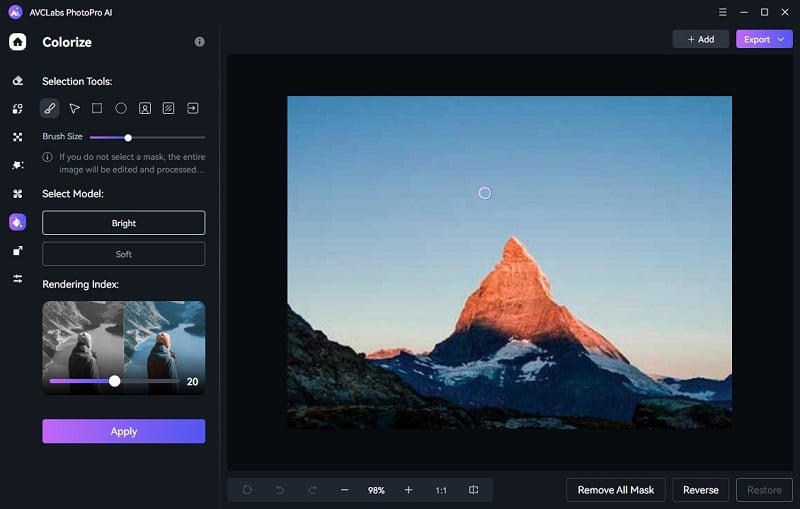
AI Colorize: Breathe new life into black-and-white images with the Colorize tool. It automatically adds natural, realistic colors to monochrome photos based on content analysis.
AI Upscale: With the Upscale tool, you can increase the resolution of your photos without compromising quality. AI reconstructs fine details to deliver crisp, high-definition results.
AI Toning: Toning gives you fine-grained control over your image’s appearance. Adjust brightness, contrast, saturation, transparency, and blur to achieve your desired look with precision.
Select the Area
Use the Selection Tools to define a specific area or object, or leave it unselected to apply the effect to the whole image.
Selection Tools
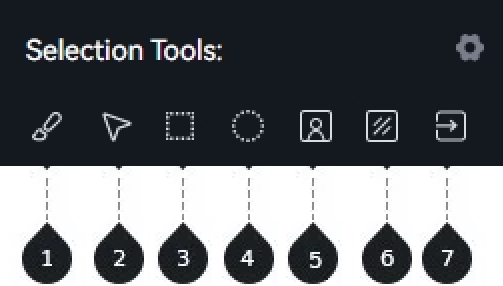
1. Brush: Use a brush to select freely, you can adjust the brush size to ensure precise selection.
2. Object selection: Make selections by clicking on the image. Left-click to expand regions and right-click to subtract regions from the selection on the image.
3. Rectangle selection: Select areas in a square or rectangular shape.
4. Circle selection: Select an area in a circular shape.
5. Foreground selection: Click this button to select the foreground.
6. Background selection: Click this button to select the background.
7. Load from local: Import a local PNG image mask.
*Note:
1. You can right-click to subtract the selected regions when using brush, object, rectangle and circle selection tools.
2. There will be a bottom bar with options to remove all masks, reverse and restore the selections.
Make Final Adjustments
Make additional adjustments according to the AI feature you selected, and click Apply to proceed.
Export
If you are satisfied with the result, click Export to save the final image.
 Hot Products

Hero Products


Highly Recommended
AVCLabs Video Blur AI
Video blur and face blur app to blur background, faces or any part of a video.
View Details FAQ