Burn DVD

  • How to Burn DVD?
  • Step 1. Add Videos
  • Go to the "Burn DVD" panel burn dvd. Click the Add button (Also through the menu item File-> Add File(s) to burn dvd or drag files to the list directly from your disc or other location) to select the files you want to import.
  • At the bottom of the Burn DVD window, disc capacity bar with two types capacity (DVD 4.7G, DVD DL 8.5G) displays different status according to the size of the added files. When no file added, disc capacity bar is blank. After adding files, Green represents plenty of space, yellow is running out of space, and red is warning the available space has been exceeded.
  • Tips: The videos in the list can freely add, delete, sort and preview.

  • add video files


  • Step 2. Set Template
  • Click Template drop-list to set a template as DVD menu for self-made DVD files. The selected template will be displayed in the below window. And then click Preview DVD button, the DVDPreview window pops up with added files, next/ previous button and play button.
  • Tips:
  • (1) If Template is None, it doesn't support to preview DVD.
  • (2) If no file added, it also doesn't support to preview DVD.
  • (3) Next/ previous button displays according to the number of the added files.
  • (4) Click play button or click the file in the DVDPreview window to play the video.

  • set the template


  • Step 3. Adjust Option
  • DVD Label: The default name is My DVD. Or customize it.
  • Aspect Ratio: Setting the aspect ratio of the video, such as 4: 3 or 16: 9.

  • adjust option


  • Step 4. Set Destination
  • Burn To: Setting the output type. Including Save as DVD folder, Save as image (.iso), when DVD device is detected, you can check it to save files in DVD disc.
  • Folder: Click the Destination- Folder drop list and then click Choose… to set the destination.
  • Tips: The default output directory is / Users/ user/ Movies, and click Reveal In Finder could open the path.

  • set the destination


  • Step 5. Start to Burn DVD
  • Click the Burn DVD Now button and then progress bar pops up.
  • Tips: You are unable to operate other functions temporarily, before the completion of burning.
  •  

    burn dvd


  • Step 6. Finish to Burn DVD
  • After the burning is done, it will be deleted form burning list, and then added to Task- History- Burned list.

  • finish burning


Testimonial
User testimonial of Any Video Converter

"Have captured some Netflix streaming videos. Good quality! " -- Jane White

"Your HTML5 output profile with embedding code, really rocks! Easily shared DV on my site!" -- Eric Gates

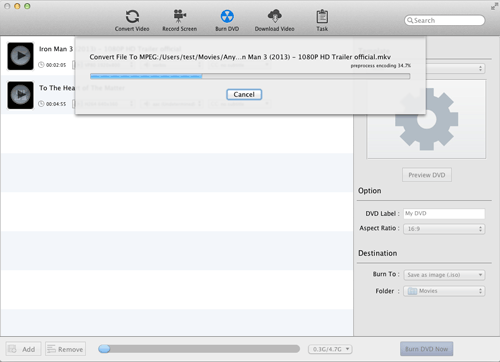
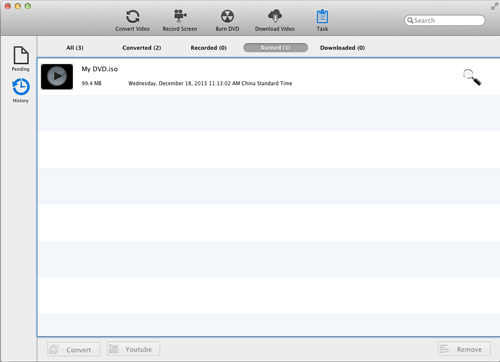
"To my surprise, your video converter can also create DVD movies and record videos. Really an excellent bonus!" -- David James

"AVC Ultimate merits its label as the ultimate multimedia solution!" -- Loring Lee

YouTube video Reviews Rave Reviews

Awards

Lifehacker award for Any Video Converter Free Version

Top 10 Free Video Encoders, and Converters


PCworld award for Any Video Converter Free Version
Top Editor Review from PCWorld


5 Stars
Top Editor Review from CNET

Video Converter Ultimate
Copyright ©2022 Anvsoft Inc. All Rights Reserved.